FX Sequencer Window
The FX Sequencer window contains controls that allow you to sequence and animate effect patterns in MixEmergency.
This window can be shown/hidden from the Window menu, or by using the FX Sequencer window button on the Main window.
FX Sequencer View
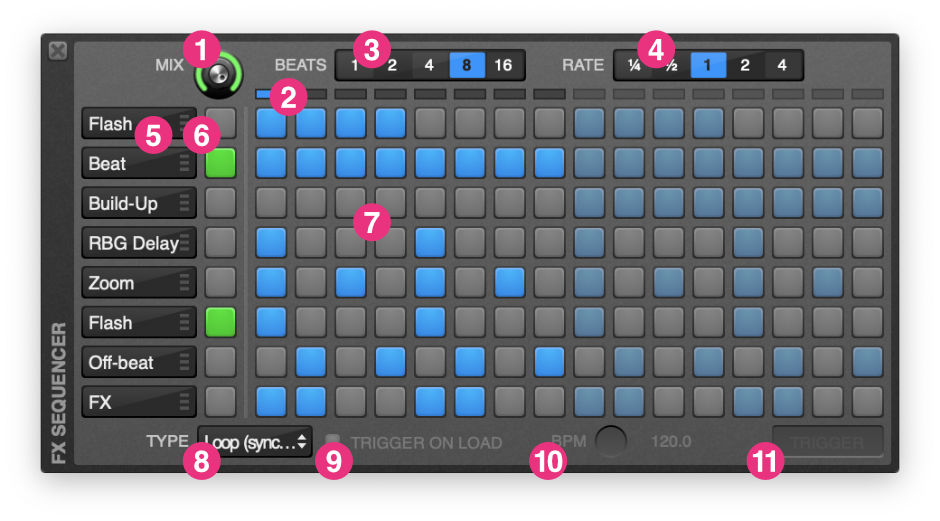
The FX Sequencer view contains the basic controls for sequencing and blending your effect sequences.
- Master Wet/Dry Mix - Controls wet/dry mix for the effect sequencer over the output of MixEmergency.
- Beat Indicator - Shows the current beat position within the sequence.
- Beat Selector - Selects the duration of the sequence (in beats).
- Rate - Selects the rate at which the sequence progresses (relative to the beat of the media).
- Effect Label/Editor - Displays the title for the effect row, and opens the effect editor. Right-click on this to copy/paste effect animations.
- Row Enable - Enables the effect.
- Sequence Matrix - From here you can enable the effect on specific beats.
- Sequence Type Selector - Allows you select the type of sequnced. You can select Loop (synced), One-shot, or One-shot (synced).
- Trigger On Load - When this is enabled, One-shot sequences will be triggered when they are loaded from an FX Sequencer preset.
- BPM Knob - Allows you to set the BPM of One-shot sequences.
- Trigger Button - Triggers a One-shot sequence.
FX Sequencer Edit View
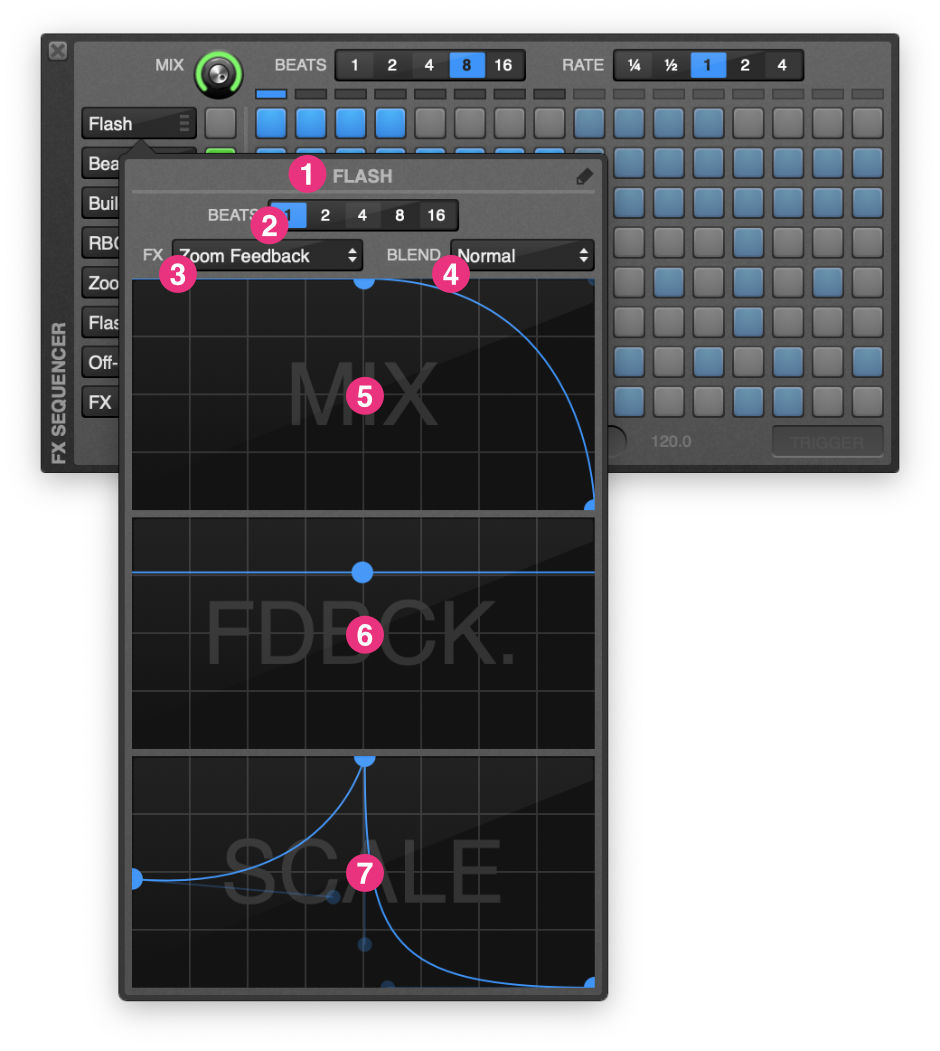
The FX Sequencer Edit View allows you to edit the effect.
- Title - The effect title (this can be renamed by pushing the edit button to the right).
- Beat Duration - Selects the number of beats that the animation will cover.
- Effect - Selects the effect.
- Blend Mode - Selects the blend mode for the effect.
- Effect Mix - This mapping graph controls the mix parameter over the course of the animation.
- Effect Parameter 1 - This mapping graph controls parameter 1 over the course of the animation.
- Effect Parameter 2 - This mapping graph controls parameter 2 over the course of the animation.
Editing the Mapping Graphs
The Mix, Parameter 1, and Parameter 2 mapping graphs allow you to create complex animations.
To add a new point:
- Right-click, and then select "Add Point", or
- Left-click while holding the Command key, or
- Double-click
To remove a point:
- Right-click on a point, and select "Remove Point", or
- Left-click while holding the Command key on a point, or
- Double-click on a point
To extend a control point (for a smooth bezier curve):
- Hold down the alt/option key while clicking on a point
To have fine control over a point:
- Hold down the shift key while clicking on a point